Home ♥ ♥ Facebook

Wednesday, August 29, 2012

More Copic Coloring


Hello everyone!!! 


My summer vacation is nearly over...and I go back to work the day after Labor Day. I've gone in to set up my classroom and I'm ready for my new students to arrive! 

Since I only have a few days left, I decided to keep my mind occupied by using my Copics to improve my coloring. Here are two cards that I worked on today.


The Halloween card is super cute! The paper comes from the Mischief (retired) paper pack from Close to My Heart. The sentiment shape comes from the Artiste cartridge and the sentiment comes from the Spellbound Workshop on the Go Kit from Close to My Heart. Although the Mischief paper is recently retired, the new Moonlight paper pack is just as adorable!


This card I think has a slight vintage feel to it. The paper comes from Kaiser Kraft paper pad. The border comes from a Martha Stewart Punch. The flowers are Prima flowers. The ovals come from the Art Philosophy cartridge. Both the Art Philosophy and Artiste cartridges are exclusive to Close to My Heart. PM me for details on how you can get FREE SHIPPING on either cartridge.

I hope that you have enjoyed my creations and I hope that I have inspired you to become crafty!

Friday, August 24, 2012

Using My Copic Markers

Hi Everyone!

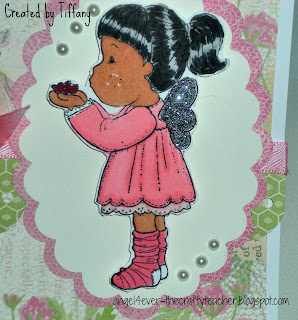
I've been busy these past few days working on projects for the upcoming release of A Homespun Affair. In the meantime, I've been practicing coloring using my Copic Markers on a Tilda stamp. I REALLY enjoy using Copic Markers! For her skin, I used the colors E00, E11, E13, E21. Although I know I need more practice, I'm quite happy with the results!


The scallops and the border are from the Art Philosophy cartridge from Close to My Heart. I used silver Stickles on her wings. The paper is from the Lucy Paper pack from Close to My Heart. The sentiment also comes form CTMH. I added some pearls to give more dimension. The ribbon is from my personal stash.

I hope you have been inspired to create! Happy Crafting! ♥

Tuesday, August 14, 2012

Blog Makeover; Artiste & Art Philosophy Projects

Hi Everyone!!! Today I am revealing the new look of my blog! I want to thank Sarah of Designs by Sarah for making my blog sooooo super cute! I LOVE it! She is super easy to work with and her prices are reasonable! Find her page on Facebook Designs by Sarah to find out more information about how you get your blog to look beautiful!!!

I've been busy crafting in the mean time. The first project is a card using cuts from the Art Philosophy Cartridge. 


The card base is a Kraft paper from Close to My Heart. The paper is from the Lucy paper pack (retiring). The butterflies and oval cuts are from the Art Philosophy cartridge. The sentiment comes from the Thoughtful Tidings stamp set, also from CTMH. The ribbon border is from my personal stash.

This next project is an exploding box. I enjoy making exploding boxes. The concept is similar to the one I created for our newsletter A Homespun Affair. This was cut from the brand new Artiste cartridge at 3 inches. I love that this cartridge has so many 3D objects that are great for parties and home decor. 


When you take the lid off, the box "explodes" outward. What I like about this box is that it is large enough to put a lovely surprise inside! The stamping around the box comes from the Love Life stamp set. The flowers and the butterfly on the lid both come from the Artiste cartridge. I added mini pearls on the stamped swirls around the box. The ribbon around the lid is from my personal stash and the paper comes from the Lucy Paper pack.

If you are interested in purchasing any one of these cartridges, visit my website HERE!!! I'm still offering free shipping until the end of August. And stay tuned for more projects featuring both Artiste and Art Philosophy! 

Thursday, August 9, 2012

Core Cards Creative Frenzy

Hi everyone!!!  Today I'm posting my submission for the Core'dinations Card Designer Design Team. First I would like to thank Core'dinations for the opportunity to try out for their fabulous team. Now --- on to the cards!

Here are the three cards that I have submitted:


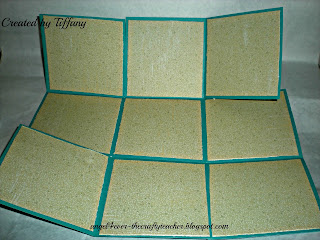
The first card I created is a flower fold card. At first glance it looks like a small  4 x 4 card. However, once you open it up, the card opens up like an accordion to reveal a lovely surprise! This type of card is very easy to make---you can make it as long or as short as you want. The base of the card is 3 sheets of card stock that measure 8 x 8. Again, you can make this as large or as small as you want. You over lap one square over another square. If you want more information on how to create the flower fold card, please see my post on July 16th. The rosette on the front of the card was cut out using the new Cricut cartridge Artiste


Front view

Inside view

Back view


I added a button with some twine on the back of the card. The paper is from the Dotty for You paper pack. 


This second card is an accordion card. I used my Gypsy to weld four tags together from the Plantin Schoolbook cartridge. The tags are 5 inches tall. I used cuts from Mini Monsters and Artiste to decorate this cute card and used ribbon to keep it closed. The black border is from the Art Philosophy cartridge.

Front view


Inside view


The last card I created was an A2 card with a white base from Core'dinations. The pink mat is called pink smoothie. The dress form stamp is from Tim Holtz and the butterflies are from an Inkadinkadoo stamp. I used Tim Holtz Distress ink in Tattered Rose on the stamps. I used a border from Ribbons and Rosettes and I layered some pink lace ribbon on top of the border. I added some pearls to give it some more dimension. 


I hope that you have liked my cards! Happy Crafting!
~Tiffany~

Wednesday, August 1, 2012

A Homespun Affair - August Edition - First VIDEO tutorial!!!

Hi Everyone!!!! It's that time again ----- the next edition of A Homespun Affair. This edition is awesome! There are tons of great projects, tips, and giveaways! I am very excited about this edition of our magazine     --- this month I have included my very first VIDEO tutorial! That's right! I am now going to be doing video tutorials on a regular basis. Here is the link below! This month the project is a tutorial on how to create an exploding box! 


Exploding boxes come in a variety of shapes, styles and sizes. 


The one in this tutorial is geared toward beginner crafters. HOWEVER, more experienced crafters would enjoy creating one as well! If you decide to create an exploding box, I would love to see it! Please link back to my blog showing off your beautiful box!

Thanks for looking!!!! 

~Tiffany~