Home ♥ ♥ Facebook

Saturday, December 28, 2013

Holiday Mini Album


Hello everyone!!

I have been missing for several weeks. I've been so swamped with paper work for school, I haven't had a chance to update my blog since my birthday. I'm on Christmas break now, and I've decided to update my blog with a video of the mini paper bag album I created for my swap partner. I really like the way it turned out.


I'll be posting other projects I have completed in the last several weeks very soon. Stay tuned for more projects and inspiration!

Wednesday, October 9, 2013

Paper Bag Mini Album

Hello everyone!

Today I decided to post my very first paper bag mini album that I created!

I created this as a part of a swap in which I participated (Paper Girls Swap). I wanted to learn how to make a paper bag album for a while, and joining this swap was the push that I needed to learn. 


I thought that it was going to be very difficult to create one. However, I was pleasantly surprised at how easy it was! I really enjoyed the process of creating this mini album and I know that I will be making many more in the near future! 

Thanks for stopping by! Come by tomorrow for more project inspiration! 


Tuesday, October 8, 2013

Link Up for Pink 2013 - Day 8

Hi Everyone,

Unfortunately, I missed posting a project for day seven because I was working on paper work and lesson plans for school. But I was able to work on a quick project today for day eight of Link Up for Pink.

Here is my project!!!


I came across these mini clip boards about a month ago when visiting A.C. Moore. I decided to alter this with pink! 

The paper is a free digital background that I found on the internet. I printed it on white card stock. I painted the back and sides of the clipboard with pink acrylic paint. I mod podged the page to the board, then added a thin layer of mod podge to seal it. I added a pink ribbon around the bottom edge and at the top. I used some of the left over paper on a binder clip.

I hope that you like this project and all of the ones you have seen so far. Come back tomorrow to see my project for day nine of Link Up for Pink! 

Sunday, October 6, 2013

Link Up for Pink 2013 - Day 6

Welcome to my blog!!!

If you haven't noticed, I have decided to post one new project a day for fourteen days to coincide with Link Up for Pink. It's been a bit challenging trying to remember to post my projects, but thank goodness for pre-scheduled posts, lol.

Here is my project for day 6.


This is a very simple card. I colored this Tilda with Copic markers. The sentiment comes from My Pink Stamper (Hope and Courage). I used a bit of washi tape just to give it a bit more color. The background paper comes from Close to My Heart (Sweetheart paper pack).

Thanks for stopping by! Come back tomorrow to see my project for day 7! 

Saturday, October 5, 2013

Link Up for Pink 2013 - Day 5

Hi!!!

Here is my project for Day 5 of Link Up for Pink! Some of the projects that have been linked are simply amazing!

For today's project, I wanted to create something that wasn't a card or a tag. I got the idea to do something altered. I purchased a 3 1/2 inch cube from Michael's. Here's what it looks like!


I used Viva Decor Inka Gold around the edges of the block. I used paper from Close to My Heart (the Sweetheart paper pack). The images and sentiments all come from Unity Stamp Company (from three different stamp sets).

I really like the way this turned out! Although I smudged the ink a little, this turned out nicely. Note to myself, next time I will stamp first before putting a thing layer of mod podge to seal. That was actually my intention, but I totally forgot, lol!

Thanks for stopping by! Come back tomorrow to see my project for day six of Link Up for Pink


Friday, October 4, 2013

Link Up for Pink 2013 - Day 4

Hello everyone!

Today I decided to create a tag for Link Up for Pink! If you haven't linked up your project yet, you still have time!!


The tag is a manilla tag from Ink Essntials. I used distressed ink in Worn Lipstick to give the tag a little color. The background paper is from a K and Company paper pack. I colored this Tilda with my Copic markers. I'm not 100% happy with the coloring, but I think the tag is still cute. The sentiment comes from Unity Stamp Company.

Come back tomorrow for my project for Day 5!

Thanks for stopping by!! 

Thursday, October 3, 2013

Link Up for Pink 2013 - Day 3

Hi!!!

I've seen some amazing projects posted so far at Link Up for Pink! If you haven't posted yours yet, you still have time!

Here is my project for day 3!


The sentiment, corner stamp, and heart all come from Unity Stamp Company. I really like the way the stamps are made and they have many great sentiments!
The paper comes from the Chantilly paper pack from Close to My Heart. I'm using this paper a lot because of the bright colors (and because I am desperately trying to use up ALL the paper I have in my stash, lol! I think I don't really need to buy paper for another six months. But I know I'll see something on sale or extremely cute and want to have it!

I hope that you have like my projects so far. Come back tomorrow to see my project for day four! Thanks for stopping by! ♥ 


Wednesday, October 2, 2013

Link Up for Pink 2013 - Day 2


Hello everyone!!!

As promised, here is my project for day 2 of Link Up for Pink


I wanted to do something a little different. I have a few Tim Holtz stamps that I had not yet used. I decided that this hot air balloon would be appropriate! The sentiment Thanks for Lifting Me Up comes from the Unity Stamp Company. I inked the edges using distress ink in Worn Lipstick. The paper comes from the Chantilly paper pack from Close to My Heart (I believe this particular paper pack is now retired). I added some bling for just a little sparkle.The card is simple but the message is strong. ♥

Come back to visit my blog tomorrow to see my project for day 3 of Link Up for Pink! Thanks for stopping by! 

Tuesday, October 1, 2013

Link Up for Pink 2013 - Day 1

Hello everyone!!!

Well school is in full swing and I have been noticeably absent from my blog. With that said, I have made it a point to make sure that I create items related to Breast Cancer Awareness Month with Just Yolie's Third Annual Link Up for Pink. You can find more info HERE!

You can also link up your project here on Diana's page. She is also hosting a link up party HERE!
I almost forgot to post my project as I was busy working on lesson plans for the next few days, but here is my project for day one of the link up. 


The stamps used are from the Kit of the Month stamp set from October 2011 called Faith, Hope, Love...Live by It. I really like this set and I really like the Unity Stamps!!! The paper comes from a retired paper set from Close to My Heart called Sweetheart.

Come back tomorrow for my project for day two of the fourteen days of Link Up for Pink!!!!!

Wednesday, August 21, 2013

Altered clipboard ♥

Hi everyone!

Well, the summer is winding down. Beach weather is almost gone...I'm not ready to give up my flip flops and shorts yet, lol!

Any way, I've been preparing for the past few weeks to go back to school. In an effort to stay organized when I am collecting anecdotes about my students, I decided to try something different. In the past, I would use a notebook to collect anecdotes. However, more often than not, I would put the notebook down somewhere and forget where I would last place it. Also, I would put my pen down and not be able to locate it for a while.

I decided this year I would us a clipboard and have several areas in the room with a little hook designated for the clipboard. This way, I could hang it in more than one place and still keep a track of it. I also decided to alter the clipboard in some bright cheery colors so I could easily spot it in my classroom.

Here it is!!


I first painted the edges of the clipboard black. I used three sheets of card stock from Die Cuts with a View (DCWV) from the Grade School Stack. I only had the 8 x 8 pad available because I was unable to find the 12 x 12 stack. That is why I wound up painting the border black. After the paint dried, I sealed it with a layer of mod podge. I also painted the entire back of the clipboard black and put a layer of mod podge on top of that as well.

After the  mod podge dried, I cut two strips of the card stock from two of the three sheets. I cut them at 2 3/4 x 8. The apple pattern and the top and the diamond patter at the bottom are the strips I cut. The middle sheet with all the stripes is a full sheet. I layered the apple sheet and the diamond sheet on top and adhered everything with mod podge. Once the sheets dried, I put a thin layer of mod podge to seal everything.

I took four ribbon and cut them in half, then threaded the ribbon through the hole at the top. I hot glued some buttons on the top of the board. To keep my pens in place, I covered two binder clips with some of the leftover paper using my ATG gun for the adhesive.

I hope you like it! I am working on some other projects for use in my classroom. Stay tuned for more projects...coming soon!!! ♥

Saturday, August 17, 2013

Paper Girl Swap - PL cards

Hi everyone!!

I've been missing for a little bit. I've been working on paperwork for school as well as important paperwork for our home. School will be back in session in a few weeks, so I need to make sure everything is all good!

I belong to a Facebook group called Paper Swap Girls. I've been a part of the group for a couple months now. This month our theme was to create PL cards using a movie theme.


The card size is 4 x 6. I used some paper from Heidi Swap for the base. I had the perfect washi tape for this project! I used the Tim Holtz alterations die as the focal point, distressing the edges with distress ink. I used the Typeset stamp set from Close to My Heart and stamped the word 'Action' on the washi tape.
I think this turned out super cute!

I have a couple projects in the works and I'll be sharing them with you very soon!!

Monday, July 29, 2013

No Place Like Home ♥

Hello everyone!

More journal art for your viewing pleasure!!!


I used the Artful Dwellings die by Sizzix for the homes. I used a brick stencil on the body of the houses and a Martha Stewart punch for the roof. I sprayed the background using Dylusions spray. I used the newsprint rubber stamp for the text back ground and harlequin stencil as well. The alphabet stamp comes from Close to My Heart. I drew circles and outlined them with white paint and charcoal. I painted the inside of the sentiment using Golden acrylic paint. I created this scene because I like relaxing on my sofa with a good book or watching a really good movie; at home!

Stay tuned for more art work: coming soon!! ♥


Wednesday, July 24, 2013

Altered Frame ♥

Hello everyone!!

I have many photos that I've taken and they are just stored in my computer (counterproductive I know, lol). Today I decided to print one of my many pictures and put it in a frame that I altered.

I purchased this frame from Michael's (it's one of the nicer wood frames. I used a coupon and got it for 40% off the original price). Here is what it looked like before I worked my magic, lol:


Now here is what it looks like after I worked on it. 


This picture was taken two years ago when I completed my Master's degree. I was definitely happy!!

I first painted the frame with acrylic paint from Golden. The paper is from Close to My Heart and the flower is from Prima. The banners on the top left were punched using my Big Shot and the Spellbinder's die Pretty Pennants. I used a scallop and circle punch for the "medallion" on the top left. The happy banner on the top right is from a clearance shelf at Michael's. I think the manufacturer is My Mind's Eye (although I'm not 100% sure). I used my Xyron 1" sticker maker to adhere the banners and medallion.

I really like the way this turned out. I'm going to have to print my pictures and put them in frames more often!

Stay tuned for more art work and projects: coming soon! ♥


Sunday, July 21, 2013

Altered Magazine File ♥

Hello everyone!

I went to Target yesterday to purchase some items and I came across this magazine holder. When I saw it I thought to myself, how can I make it look a little more interesting.

Here is what it looked like before...


Although the chevron pattern was pretty cool, I decided that I wanted to look a little different. Here is what it looks like now...


close up of inside...


I already have some solid card stock inside of the magazine file to sit on my shelf. It looks pretty good there!
Thanks for stopping by! I have more projects on the way! ♥


Monday, July 15, 2013

Adhesive Foil Art ♥

Hello all!

During my summer break, I always try to learn new things. Whether it is a new crafting technique, a new skill or gaining some new knowledge, I love learning! I guess that is one of the reasons why I became a teacher (in addition to a love of nurturing and imparting knowledge).

After having a discussion with some other crafters in a group in which I belong, I decided to attempt a new technique - using adhesive foil and adhesive mesh tape (the one used for dry wall). I ventured to Lowe's as I was informed that I where I would find the necessary items. Both the adhesive foil and the adhesive mesh tape can be found in the aisle with all the other tapes.


I laid down the adhesive mesh, gears, heart and love down on the page. I layered the foil on the top, crumpling the foil before laying it down. I then used the tip of a quill tool to dry emboss around the shapes. Next, I applied a thin layer of black acrylic paint, wiping it off and leaving just enough to stain the page. Finally I used Viva Decor Inka Gold in Yellow Gold around the page.

I am really happy the way this turned out! The only thing I would do differently is pulling some paper through the binder so the black ink doesn't stain the edge of the page. Otherwise, I really like it! And I hope that you like it too!

Stay tuned for more journal art --- coming soon!!! ♥

Sunday, July 14, 2013

Art Journal ♥

Hello all!

Since the summer is here and I have more "free time" on my hands, I decided that I wanted to create an art journal for myself. Since I have been really immersing myself in to mixed media art, I thought that it only makes since to create an art journal.

I created this 8 1/2 x 11 art journal using my Zutter bind it all. I purchased the chipboard covers on Amazon (I don't remember the name of the company). The o-wire is one inch wide. The paper inside is Recollections. 


I used Tim Holtz stamps, gelatos, acrylic paint,  Viva Decor Inka Gold, and Martha Stewart punch on the cover. The title "Art Journal" is one of the fonts I used from my collection. I printed the letters and "fussy cut" them.


This is the very first page that I have completed in my art journal. The title says "Life is a...Carnival". The background was done using Viva Decor Inka Gold and Tim Holtz stamps. The images and font came from a free digital collage. At the moment I do not have the link, but as soon as I remember where I found this page, I will post the link.  I love this page!!! Life can be a carnival, if we want it so.  I actually completed this page before I bound the book together so I was able to get the color around the entire page.

I hope you like what you see! I'll be posting the next page in my art journal soon! 


Wednesday, July 10, 2013

Some summer projects ♥

Hello everyone,

Here are some projects I had a chance to complete recently!


I made the journal for a friend. I altered the clothespin to match the journal cover. 


This is the first page I worked on in the journal I recently created for myself. I love the colors!! I am in the process of creating a larger journal for art so that I may have more room to work. ♥


This is a birthday card I made for my hubby (his birthday is at the end of June).


I hope you like what you see. Summer vacation is here and I'm keeping busy! New projects will be coming soon! 

Friday, June 14, 2013

My first completed journal! ♥

Well the school year is winding down...cum folders, report cards, transfer slips, cleaning and sanitizing materials, dusting furniture, etc.

I have to say that I really enjoyed my class this year; one of the best I have had in my eight years of teaching. BUT...
I am SO READY for Summer vacation!!

I managed to find some time to make my first handmade journal. It's simple, but I am so very happy that I completed it despite being very busy!!


I used Graphic 45 paper from the French Country collection. I REALLY LIKE the paper from Graphic 45. It is amazing!! I love the colors and I especially love the vintage inspiration!
I used a 5 x 7 1/2 chipboard cover for the front and back. The front cover has G45 paper. I used some craft tags that I had and inked them with Tim Holtz Distress inks in Tea Dye. I used a variety of rubber and acrylic stamps (Recollections, Hero Arts, Inkadinkadoo, and Close to My Heart). The inner pages are cream colored card stock from Michael's.
I used my Zutter Bind-it-All to punch the holes and close the wire. Next time I'll use about 5 sheets less as the book closes but the spine is very tightly held together.
I am so happy to be have completed this journal.  I can't wait to fill this journal with my thoughts and musings on a regular basis. :)


♥ 

Saturday, May 4, 2013

A couple cards...

Hello everyone!!!!

I had some free time today (in between lesson plans and grocery shopping), so I worked on a couple vintage cards. I hope that you like them!


The background paper comes from Close to My Heart (Avonlea paper pack).


I saw this "I Love Paris in the Spring time" stamp in Michael's and I knew I had to have it!  

Friday, May 3, 2013

Trying to post more often...


Hi everyone!

I've been trying to post more often. Unfortunately with so many changes at my "real" job, I haven't been able to post as often as I would like. So, here are a few cards that I have made within the last few days...


Experimenting with washi tape!


The zebra print and pink look awesome together! 


This third card is one of my favorites. I wanted to emboss the sentiment using brown embossing powder (of which I have none). I figured out to use Tim Holtz distress inks (in whatever color you wish to use) and clear embossing powder. The powder will dry the color of the ink used! No need for me to buy a ton of different colored embossing powders! 


I love the look of the typewriter!! 

Sunday, April 7, 2013

Spring Bling-A-Ling Blog Hop!


Hello everyone! Welcome to the Spring Bling-A-Ling Blog Hop!

Please start at the beginning with our host Suzanne! 

Here is the line up so that you may check out ALL the wonderful projects!
5 Janet http://ladyluvbug.blogspot.com/<---------YOU CAME FROM HERE!
7 Julie www.thecricutchirp.com <----------- GO HERE NEXT!
9 Robin http://create-a-latte.blogspot.com/


Spring has been a little delayed here, but I've been busy crafting hoping Spring will arrive any day now. My first project is some Project Life filler cards. I honestly do not do Project Life, but I am participating in a swap with another group who does. I decided I could use the filler cards anyway with my SMASH folios.
The paper comes from Close to My Heart from the Buzz and Bumble paper pack. The hexagons and the sentiment come from Close to My Heart as well. The bee is a small Recollections stamp from Michael's. I used Tim Holtz distress inks (walnut stain, rusty hinge, antique linen) to stamp. There is also a little "shimmer" on the hexagons but it is hard to see in the photos.

Here they are:

I made quite a few of these and I will be giving away two sets of these filler cards to two followers. In order to receive a set of these cards, you have to:
A) Become a follower of my blog AND B) Leave a comment saying that you are following. 

Please leave your email in the comments as well so that I may contact you if you are a winner. A winner 
will be chosen on Wednesday, April 10th after 8PM 
EST using random generator.


I've also been getting into mixed media art. My last two blog posts have been projects using mixed media. Although it is not "Spring" related, I love the way this project turned out!


 This is a 12 x 12 canvas that I purchased from 
Michael's. I painted the canvas with acrylic paints. I used a variety of rubber stamps (Hero Arts, Inkadinkadoo) to stamp on the canvas. I used two wooden time pieces to use as centers for the watch. The gears were cut from the Artiste cartridge at 2 1/4 inches and 3 inches using heavy chipboard. I used Pewter distress stain to give the gears a polished look. I didn't make it even because I wanted the gears to have the look of having been used. I also used my newsprint rubber stamp and used distress ink to give the gears some dimension. The steam punk tags come from Graphic45. I used some lace and some musical notes washi tape as well. The keys are from Michael's and have a little bling in the handle of the keys. I hope that you have enjoyed your visit and that you have been inspired to create!

Don't forget to leave a comment on all of the blogs in this hop to win this fabulous prize being sponsored by our host Suzanne.


PLEASE GO TO JULIE NEXT!

Wednesday, April 3, 2013

Dream


Hi everyone!!! 

I am on Spring Break this week and I have been busy crafting. Here is another canvas that I altered...I absolutely love it!!!


The letters are chipboard letters I have had in my stash for a couple years and couldn't find a project for them. Today I found a use for them! 

I absolutely love the colors (of course because it is Spring colors)! The background paper comes from the Chantilly paper pack from Close to My Heart. I used distress ink around the edges of the letters and the birds. Everything else came from stuff I had in my stash. The flowers were cut out at 7 1/2 inches using the Art Philosophy cartridge using white card stock. I sponge painted the flowers on both sides and used a background stamp on both before rolling and securing them. 


I worked on this for a few hours before completing it. It has been very therapeutic for me! I'm already planning my next canvas to work on!

Thanks for stopping by!!! ♥

Sunday, March 31, 2013

Carpe Diem - Sieze the Day ♥

Hello Everyone!!!

Since I am officially on Spring Break, I sat in my craft room for a couple hours to craft my little heart out! I've been in sort of a funk because of so many things going on, but I snapped out of that blue funk and decided I wanted to alter another canvas.


One of my favorite quotes is Carpe Diem which is Latin for seize the day or seize the moment (depending on whom you ask). I first heard this watching Robin Williams in the movie Dead Poets Society and I have never forgotten it. I wanted to do something incorporating that quote and decided altering a canvas would be ideal.

I started out with a blank 8 x 10 canvas like the one pictured below.


I tore different types of paper and adhered them to the canvas using mod podge. 


 I used turquoise acrylic paint and painted around the edges.


Next, I used Tim Holtz distress ink (Walnut Stain) and went around the edges. I also spritzed some Glimmer Mist (Caribbean Blue) on the background collage.


I added a doily to the corner that was spritzed with Caribbean Blue Glimmer Mist. I also used some Sugar Maple Glimmer Mist  and Santa Baby Glimmer Mist on the background.


I added some paper from KandCompany. I used a little Broken China distress ink on the sheet and distress the edges with Walnut Stain. I spritzed some bubble wrap with Sugar Maple and stamped in various sections of canvas. I took two wooden butterflies and painted them with the acrylic paint. I added some rhinestones and added some drips of glimmer mist. 


Here is the final project! I added some flowers I spritzed and some other embellishments. I think this turned out really beautiful and I'm very happy with it!!!!


I am totally looking forward to altering another canvas!

I hope you like my project and thank you for stopping by!!! ♥

Sunday, March 10, 2013

Spring Frame of Mind ♥

Hello everyone!!!!

Well, there's been a lot going on! But with all that, I am still trying to find time to craft. Crafting is definitely helping me to stay relaxed and I'm always looking to learn new techniques or improve my skills. 


I had a canvas (two actually, lol) that I purchased a year ago and didn't know what to do with it. It's been cold and snowy and I thought to myself, "Why don't I create something that feels like spring?" Well I sat down and thought for a moment. Here is what I decided to create! 


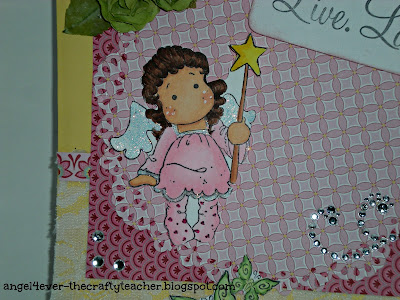
I REALLY like the way this turned out! This Tilda stamp is one that I really like and wanted to incorporate it into this project somehow. For her hair, I used E25, E27 and E29. For her dress and socks I used RV000, RV00 and RV10. I also used RV09 in the socks. The paper comes from Close to My Heart - the Chantilly paper pack. The colors are adorable and really invokes the colors of Spring. I used my Xyron Creative Station on the Tilda, the doily she is standing on, and the ribbon in the background. The doily was made using We R Memory Keepers mini 8 punch. 

I hope that you like my creation!!! I'll be back soon with another project and another giveaway!!

Friday, March 8, 2013

And the WINNER is...

Thanks everyone for stopping by my blog! Now for the winner of the altered box and scrappy goodness!


And the winner is...Dorothy Beam!!!!!


Thank you Dorothy and everyone else who participated! Dorothy please contact me with your shipping address so I can mail your goodies to you! 

Stop by again in the next couple of days for another chance to win some scrap happy goodness! ♥ 


Thursday, February 28, 2013

Crafting again! Give away! ♥

Hi everyone!!!

These past weeks have been EXTREMELY hectic and stressful. So much so, that I lost my crafting mojo. Well one load has been lifted off my shoulders and the other issue is in the process of being resolved.

So to celebrate things getting better,  I am doing a giveaway! Here is what you will receive: A cute box filled to the top with embellishments (including lace, flowers, stamps, etc)!!!


This cute little box was decorated by me using some paper, mod podge and some embellishments from my stash. In order to win this box stuffed with cute embellishments, you have to:

A. Share this on Facebook
B. Follow my blog and leave a comment below stating that you are following my blog.

A winner will be selected on Friday, March 8th (after 8pm EST) using Random generator!

Thanks and good luck!!! ♥ 

Tuesday, January 1, 2013

Happy New Year!

Happy New Year!!!

It's 2013 and I'm thankful to see another year!

I began the day spending time with my husband and doing some crafting. I don't really make resolutions, but I have some goals I would like to work on for myself (if at all possible).

*Become more active AFTER work(even if it's just 20 minutes a day)
*Post to my blog more often (my blog is beautiful! why aren't I blogging more?)
*Keep up with my happy notes project (very easy to do...one note a day describing a positive event that happened that day for the entire year. Read them all on December 31st).

*Craft a little each day (I definitely can do this!!!)
*Take off a few pounds (I actually started this on December 23rd 2012; lost 4.0 pounds so far...)

2013 promises to be a productive and happy year and I'm looking forward to all the wonderfulness 2013 has to offer! ♥